Getting Started with SAKSHAM
SAKSHAM User Start-Up Guide
After installing the SAKSHAM Full Package, the SAKSHAM Library is automatically added to your CODESYS environment through the SAKSHAM Documentation Manual.
This guide helps you start your first project with SAKSHAM, create the required structure, configure user login, and begin program development.
Launch CODESYS & Start New Project
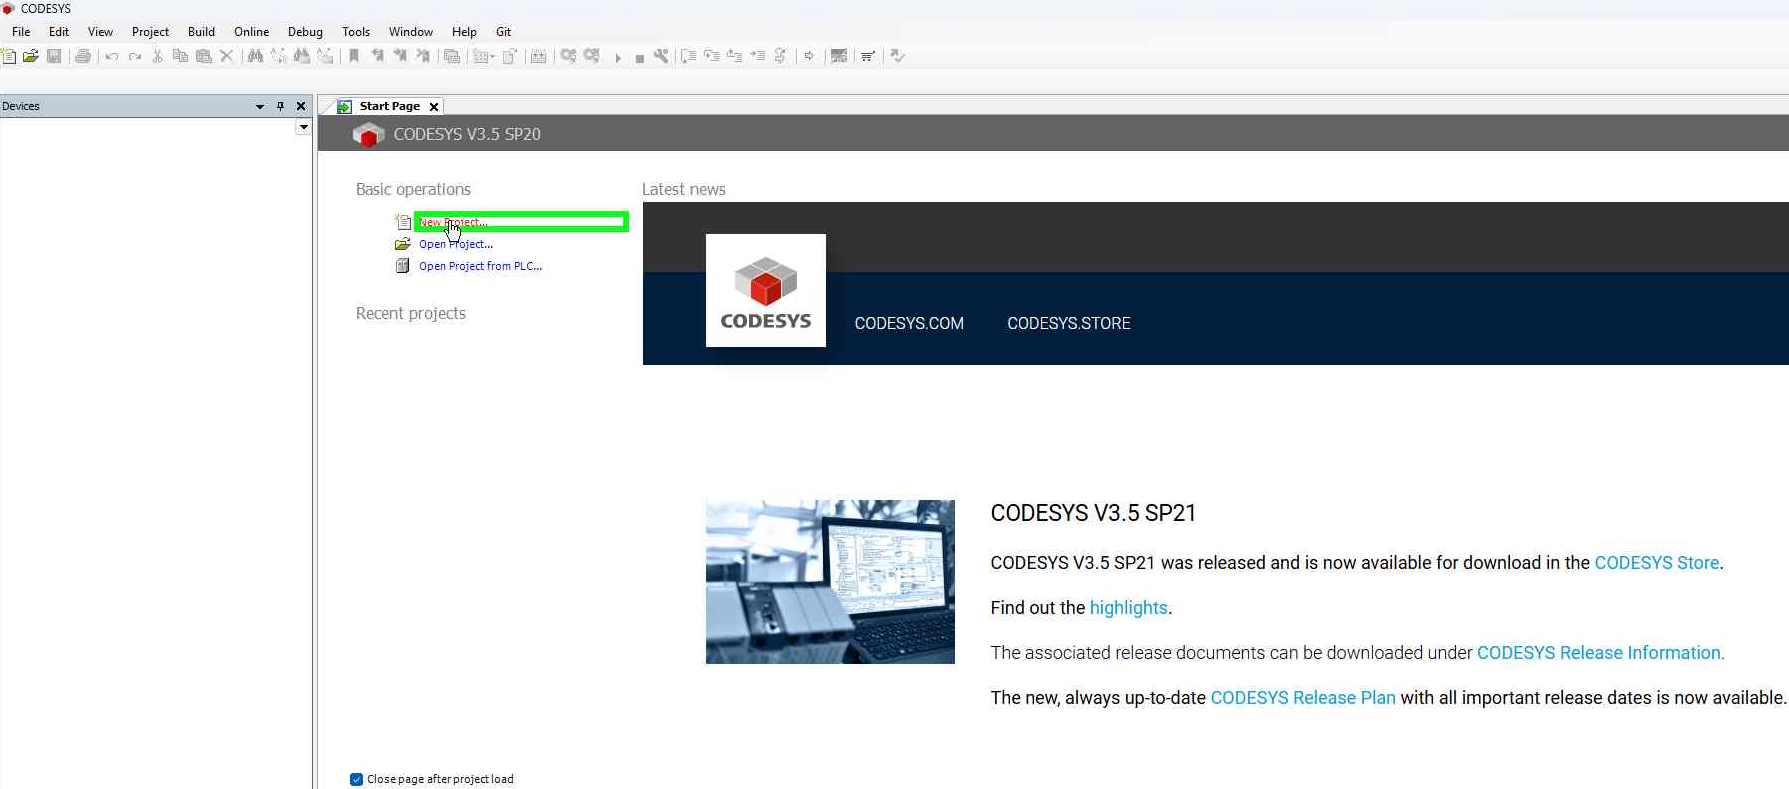
➡️ Open CODESYS and click on New Project.
Open CODESYS and follow the steps:
➡️ User must left click on New Project in CODESYS
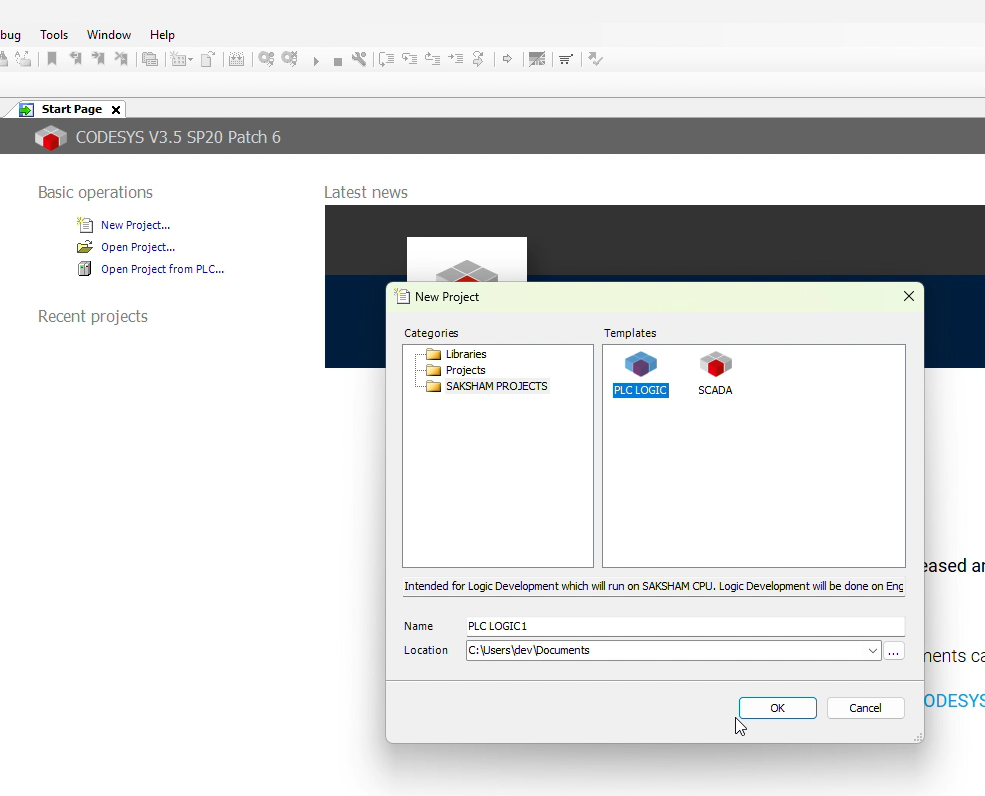
➡️ After Clicking on New project the New Project Pop-up Window appears and there you can see the SAKSHAM PROJECTS and it contains the Templates: PLC Logic and SCADA , So you can use these Templates for your Project.
➡️ Working with PLC choose the PLC Logic as for Template
➡️ Working with SCADA choose the SCADA as for Template
CODESYS Logic project
➡️ We are going to work with logic then Select the PLC Logic Template and Click on OK button.
Now use the Library for the Development of Program. Steps are as given:
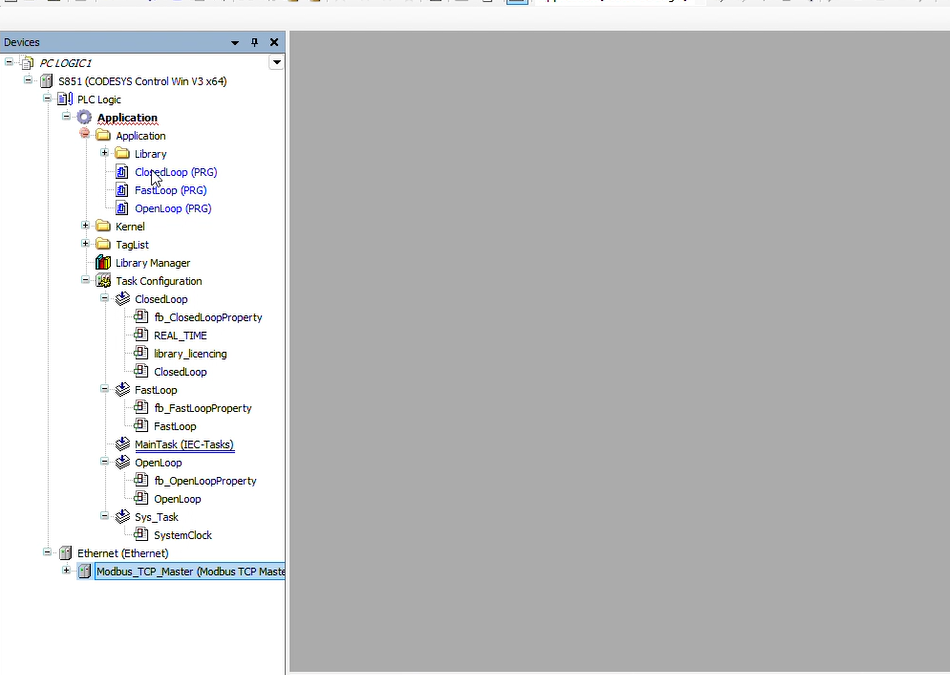
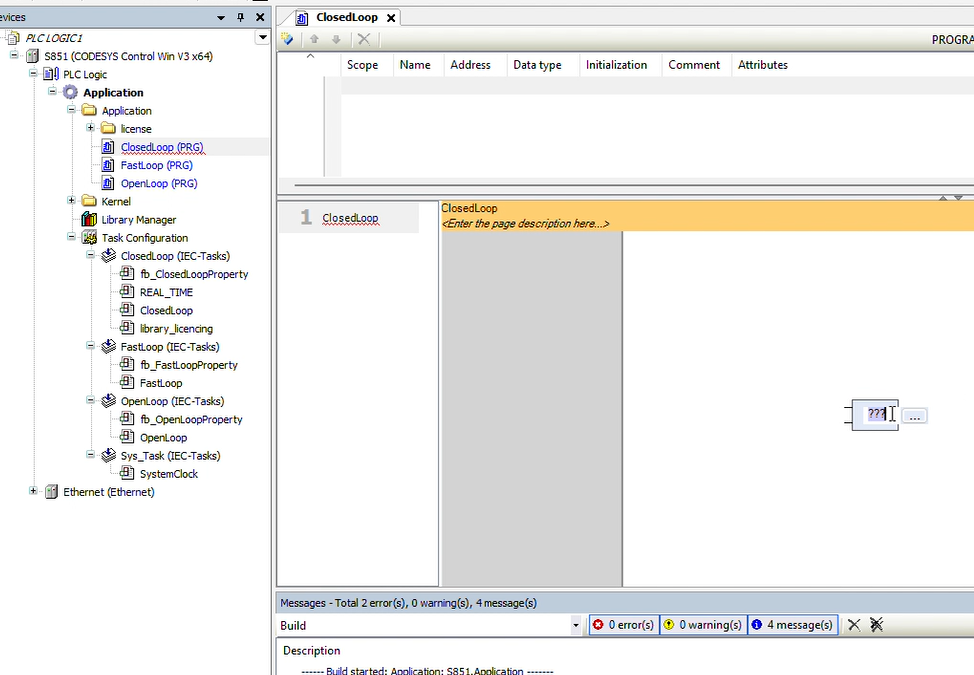
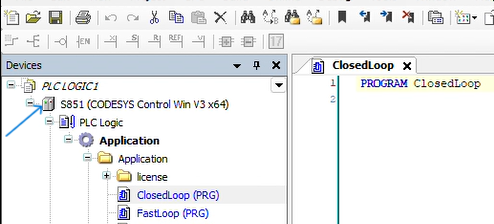
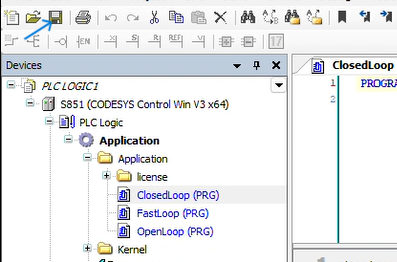
➡️ Step 1: Click on + near Application Folder
- Inside Application folder you will get 3 Program Pages :
-
ClosedLoop (PRG):- In this we can run ClosedLoop Logic Blocks (e.g: PID, DACA etc.)
-
FastLoop(PRG):- In this we can run FastLoop Logic Blocks
-
OpenLoop (PRG):- In this we can run OpenLoop Logic Blocks (e.g: Motor, MOV etc.)
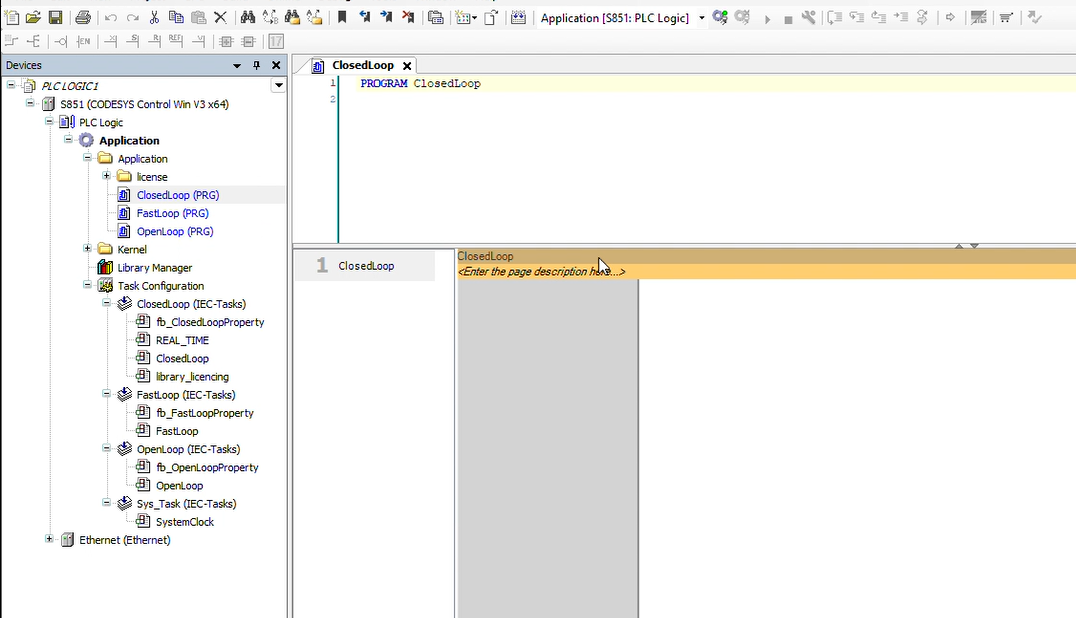
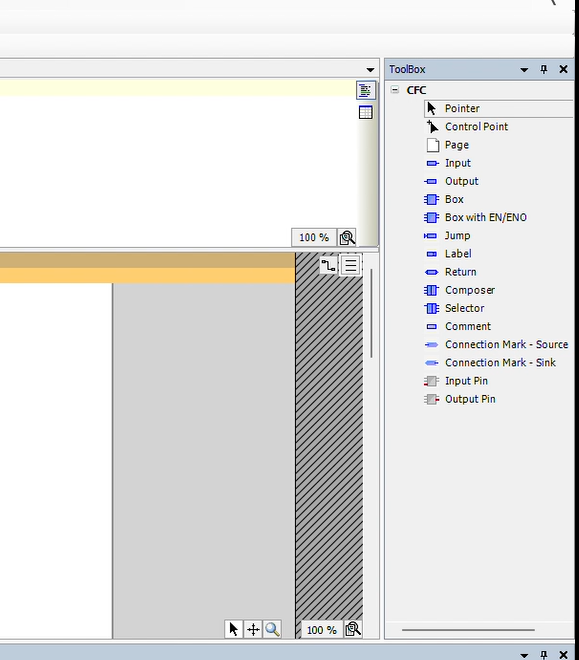
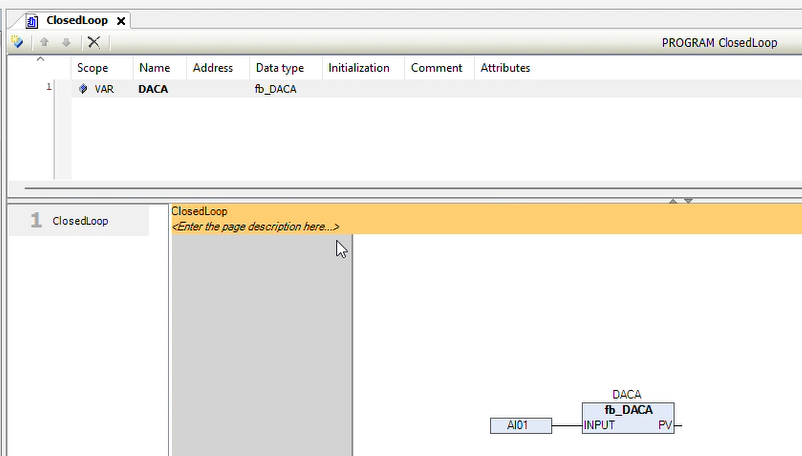
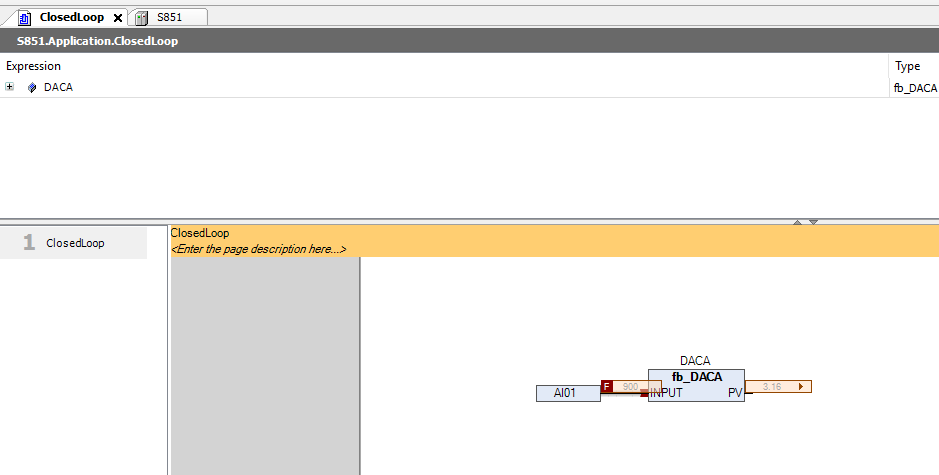
➡️ Step 2: Let's add a 'DACA block in our closed loop. Click on the 'ClosedLoop' a Toolbox open on the right side.
➡️ Step 3: Now drag a Box from the toolbox and drop in the Programs's page.
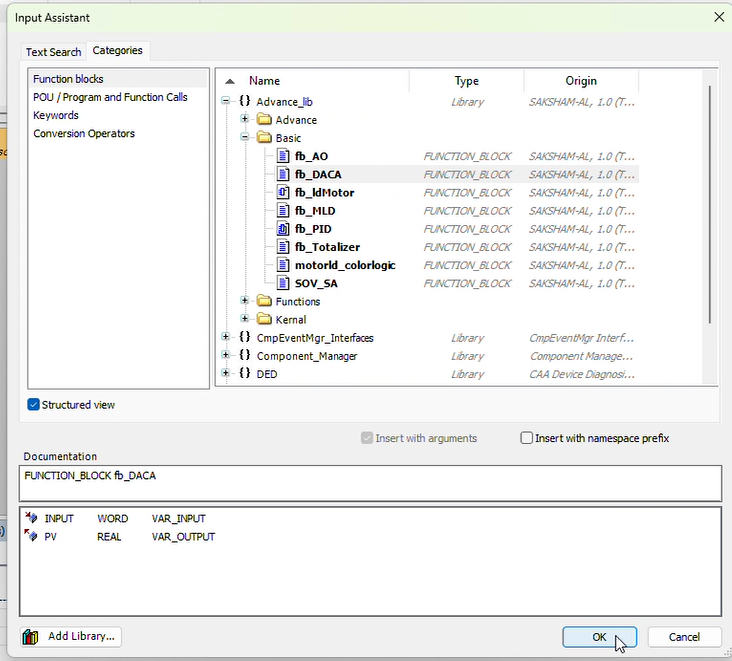
➡️ Step 4: Now Click on the 3dots a Input Assistant window will open then click on '+' in front of the 'Advance_lib'.
➡️ Step 5: Now Click on '+' infront of the 'Basic' Folder. Now click on the fb_DACA' and click OK.
➡️ Step 6: Set the name of the block by selecting the text on the top of block. And click Ok.
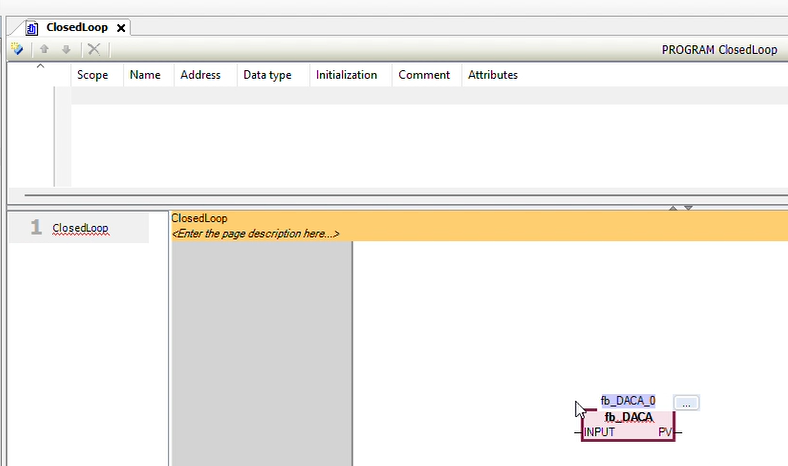
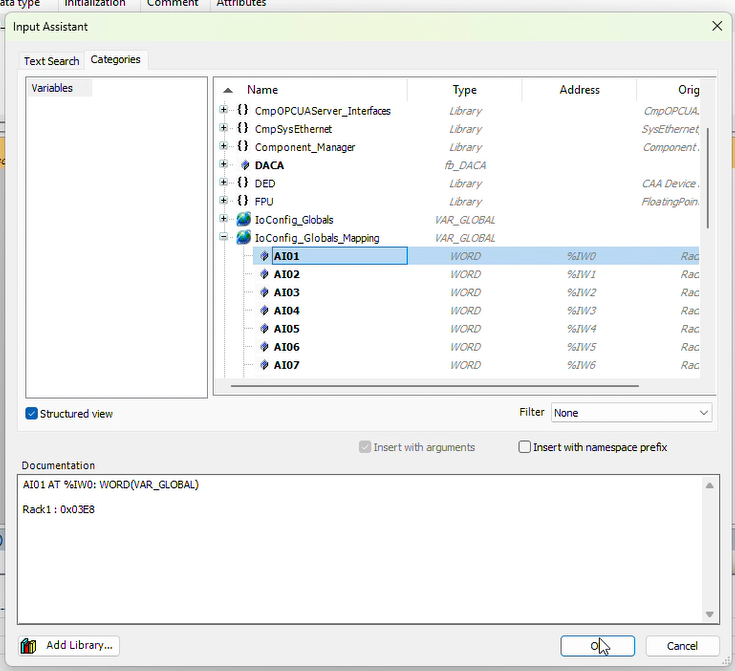
➡️ Step 7: Similarly drag a input from the toolbox and drop near input pin of the 'DACA' Click on 3dots a Input assistant open click the '+' of the 'IoConfig_Global_Mapping' and select 'AI01' and click OK. This maps the DACA input to the actual hardware analog input.
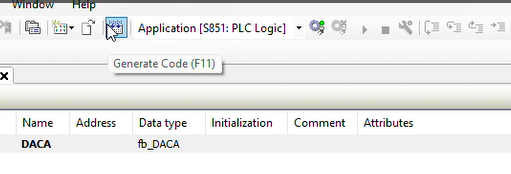
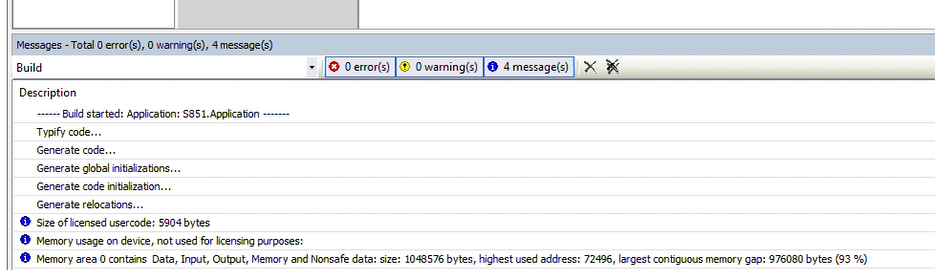
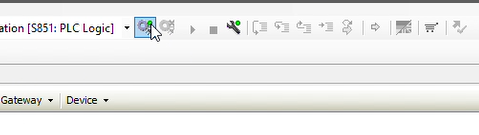
➡️ Step 8: Click on the generate code on the top of the bar. And there should be 0 errors in the Messages.
➡️ Step 9: Switch On the PLC :
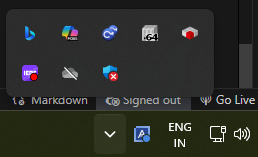
1. Click on the show hidden icon on the in the Taskbar:
2. Search for the 'CODESYS control Win SysTray - x64'.
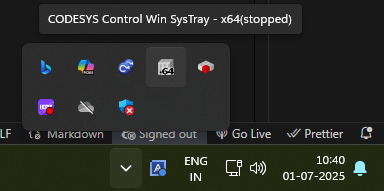
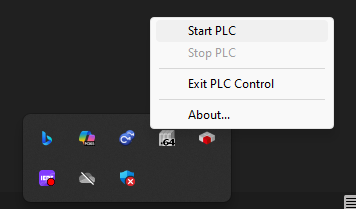
3. Click on that icon and click the 'start PLC'. The color of the PLC will be red color.
NOTE :
If you don't find the icon on the hidden icon in the taskbar then click on the 'start' click 'All' and search for 'Codesys' folder expand that and click on the 'CODESYS control Win V3 -x64'. Commond promomt will open automaticaly wait for 2,3 seconds and click Enter 2 times. Now see for the same icon on the Taskbar hidden icons.
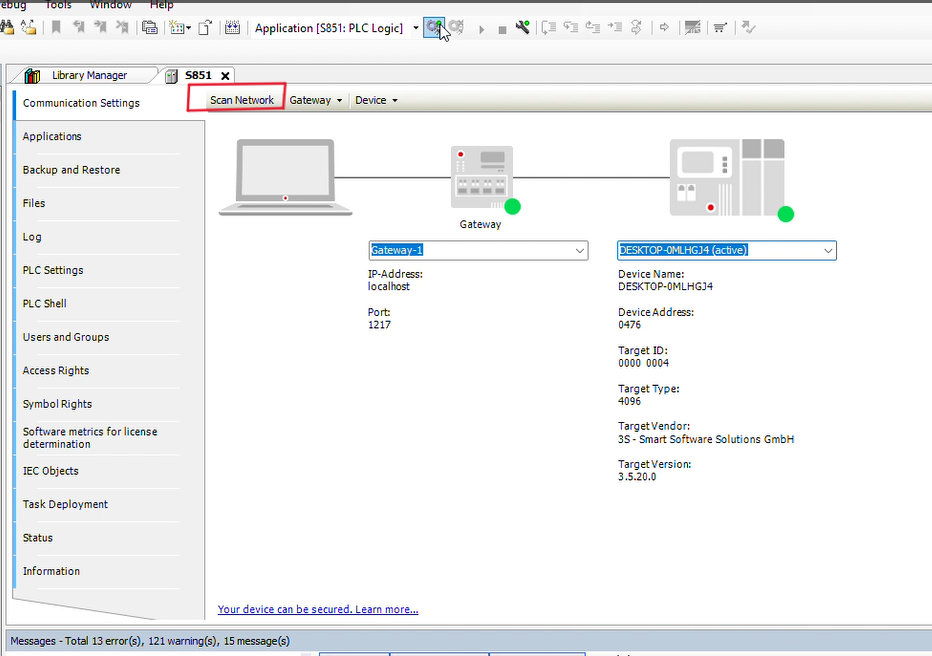
➡️ Step 10: Now Double Click on Device 'S851' and Go to 'Communication setting' and click on 'Scan Network'.
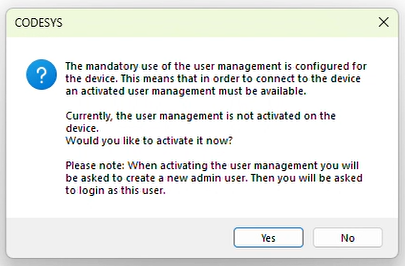
➡️ Step 11: A Popup window will open click 'Yes' to set the the User passsword for the Win-x64.
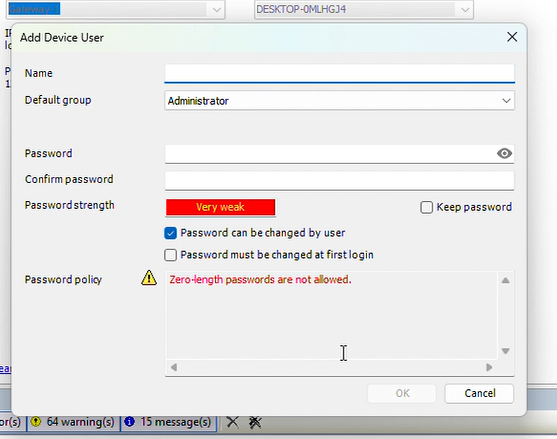
➡️ Step 12: Add Device User window will open Enter the Name as you want. Set the password and Confirm password and click Ok.
See the password policy to set the strong password. Password Example : "device@234".
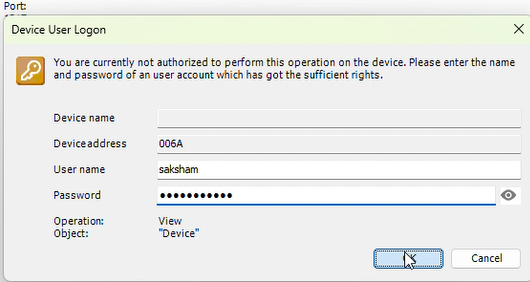
➡️ Step 13: Device User logon will open again Enter the same User Name and password and click Ok .
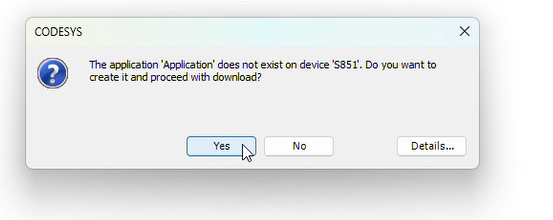
➡️ Step 14: Click on the Save button then Login.
➡️ Step 15: A pop up will open click Yes.
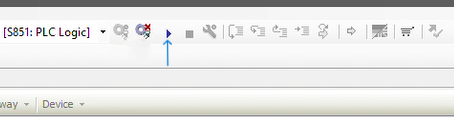
➡️ Step 16: Now device Login Click start to run the PLC.
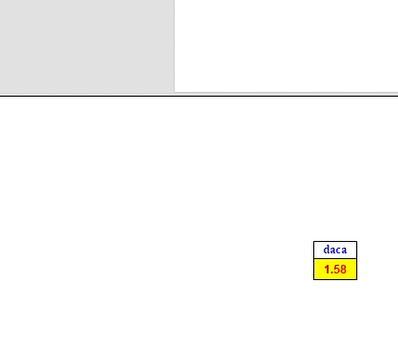
➡️ Step 17: If the signal coming from the rack the you can see in the "DACA" othewise to Force the value input in 'DACA' Double Click on the 0 and set the value like 900 and click Ok you can see the output In the PV of DACA.
You’ve successfully Developed your first CoDeSys Logic Project with the Saksham Library.
Note : To connect the Codeys logic with SCADA reamin this project open and again click on the CODESYS icon and click on New Project.
CODESYS SCADA project
➡️ We are going to work with SCADA then Select the SCADA Template and Click on OK button.
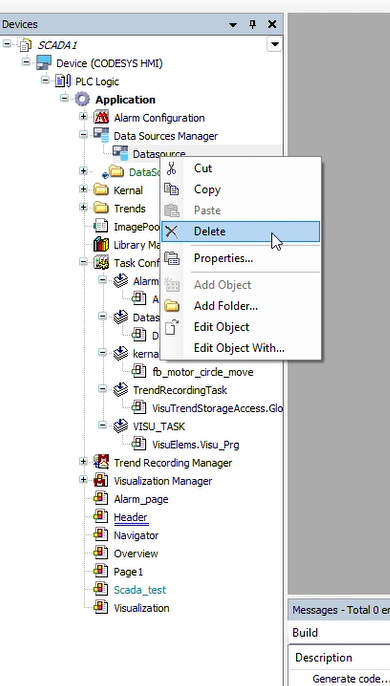
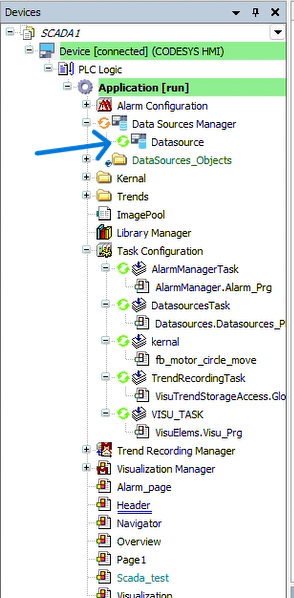
➡️ Step 1: In the device tree expand the 'Data Source Manager' Right click on the 'Datasource' and delete.
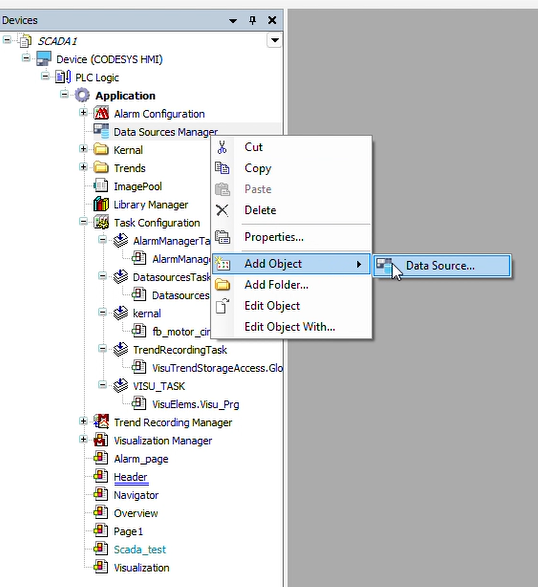
➡️ Step 2: Again right click on the 'Data Source Mangaer' click on the 'Add Object' and click on the 'Data Source'.
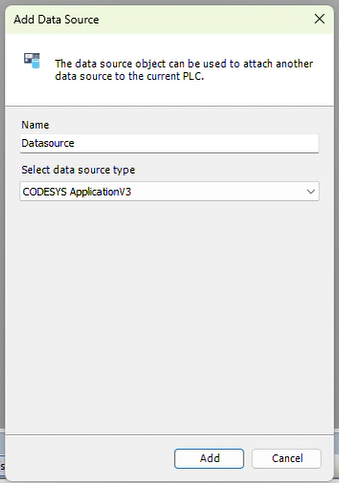
➡️ Step 3: In the 'Select data source type' select "CODESYS ApplicationV3" and click Add.
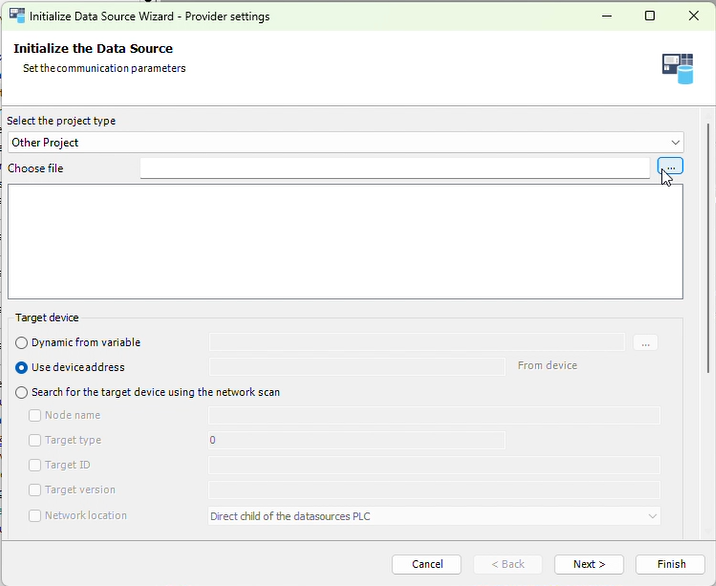
➡️ Step 4: A new window will open then expand that window then Click on the 'Current Project' dropdown select the 'Other Project' and click on the 3dot of the choose file
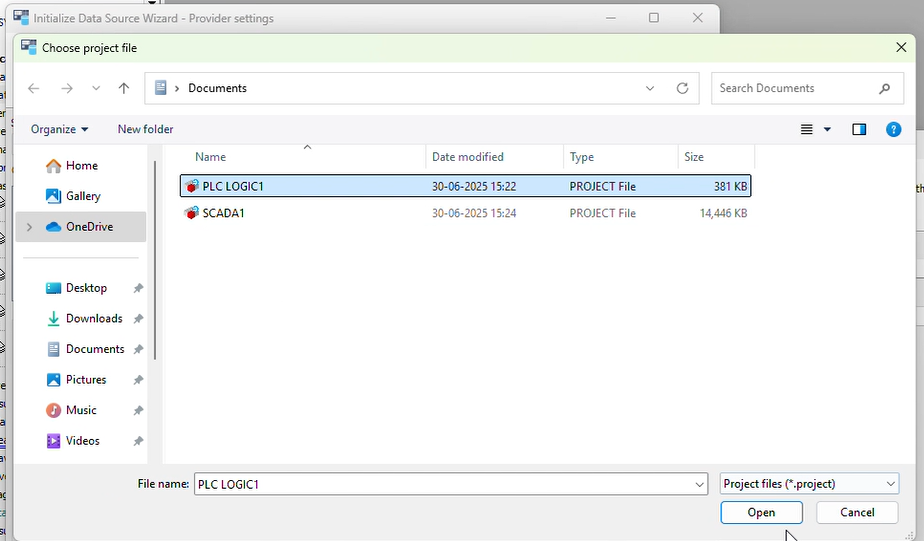
➡️ Step 5: Select the Logic project which you just created and click open.
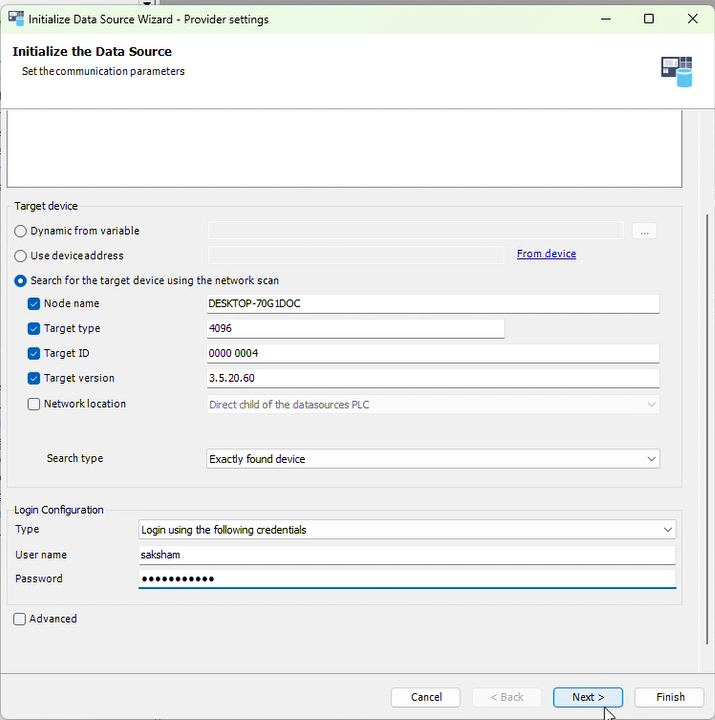
➡️ Step 6: In the Login Configuration Enter the user name and password of the Win-x64 device which you earlier created and click 'Next'.
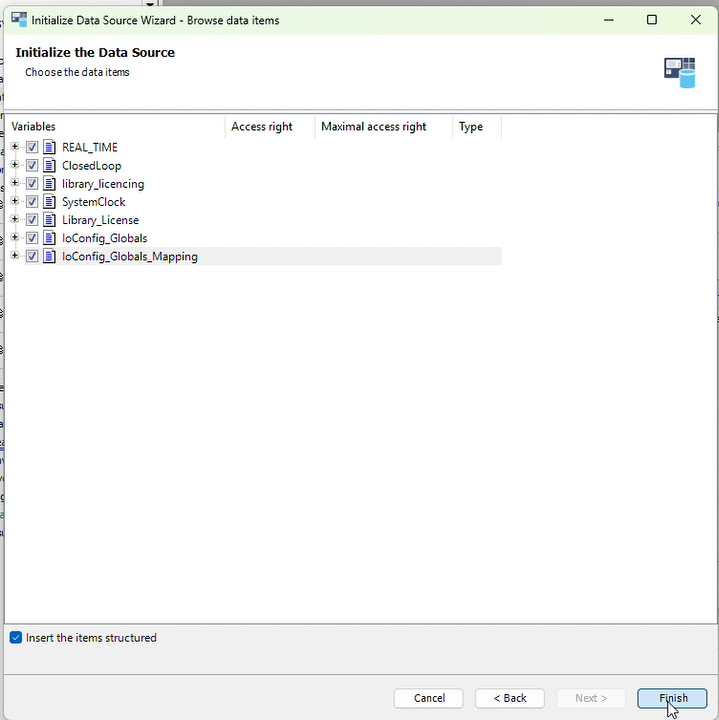
➡️ Step 7: Select all the checkbox then click 'Finish'.
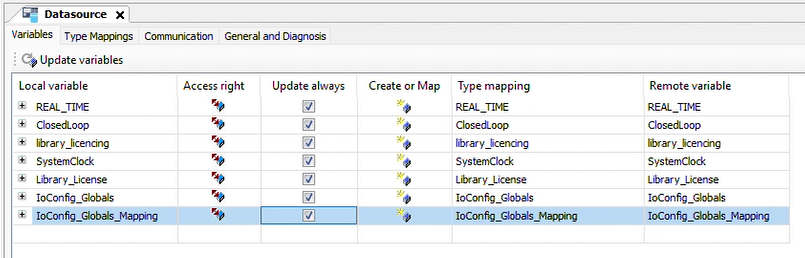
➡️ Step 8: DataSource window will open automatically check all the checkbox of the update always.
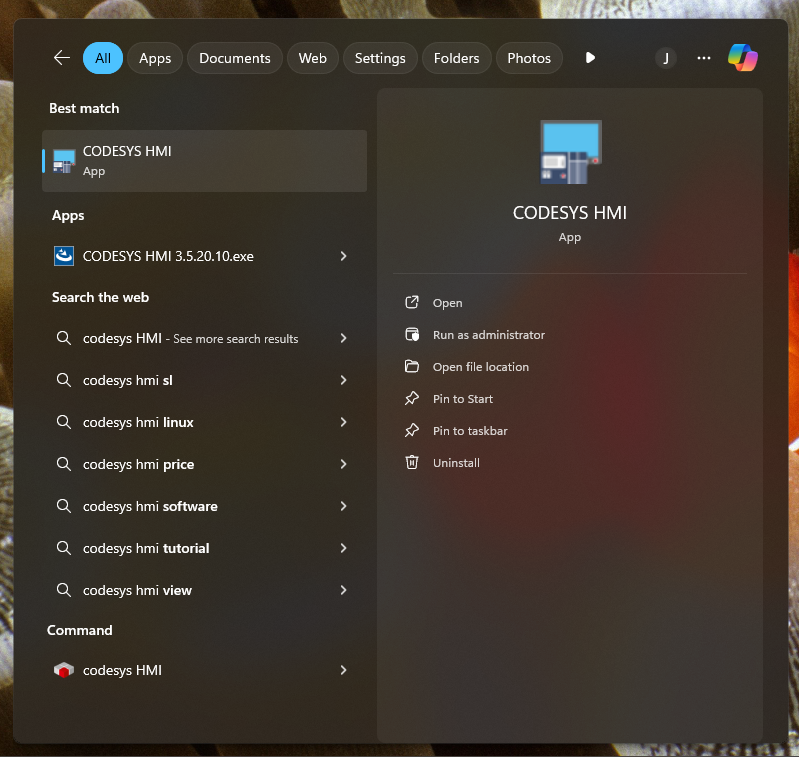
➡️ Step 9: Click on the start button search "CODESYS HMI" Click on that and give permission.
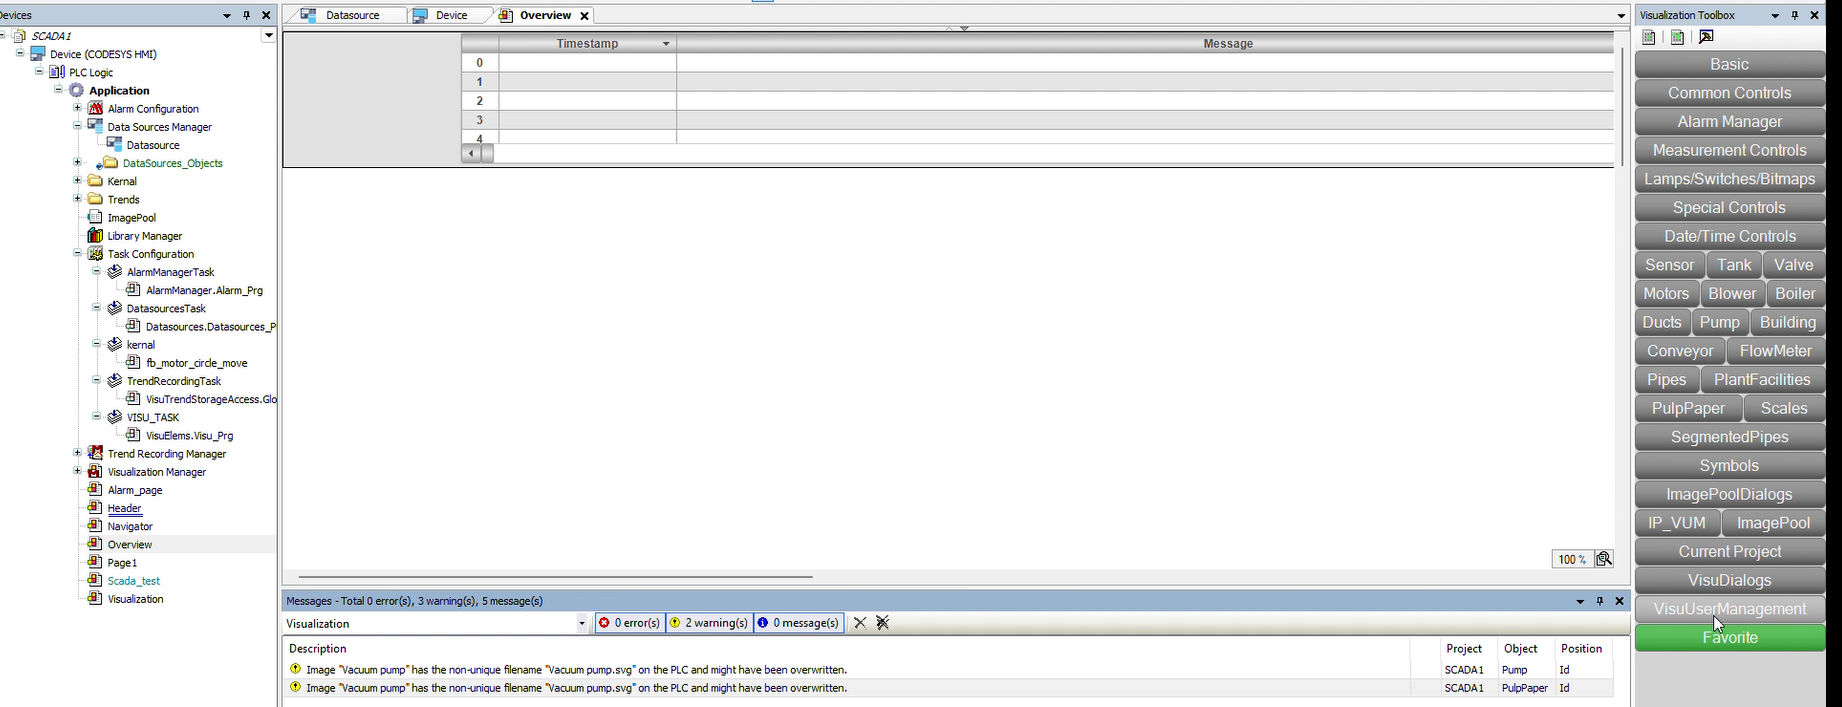
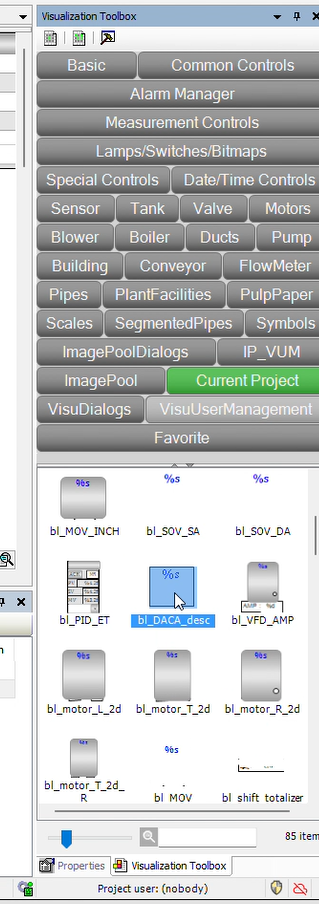
➡️ Step 10: Click on the Overview page from the device tree now a visualization Toolbox open on the right side of the screen click on current project button.
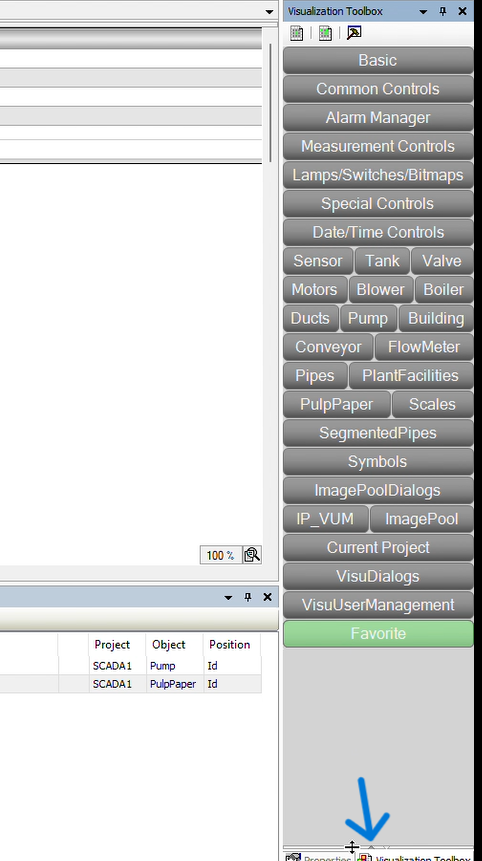
➡️ Step 11: Now at the bottom in the visualization toolbox click on the small triangle a new slide will open in that select the 'bl_DACA_desc' and click on the overiew page wher you want to place the "DACA".
➡️ Step 12: A properties tab will open on the right side of the screen in that click on the the 'refrences' then click on the the 'bl_DACA_desc'.
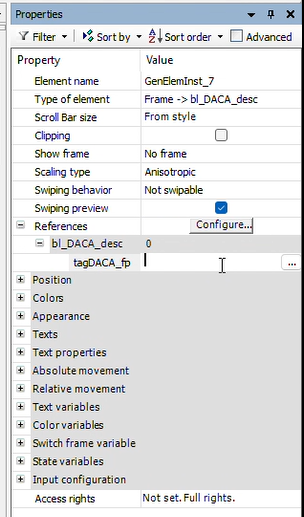
➡️ Step 13: In front of the 'tagDaca_fp' double click then click on 3dots a input assistant tab will open.

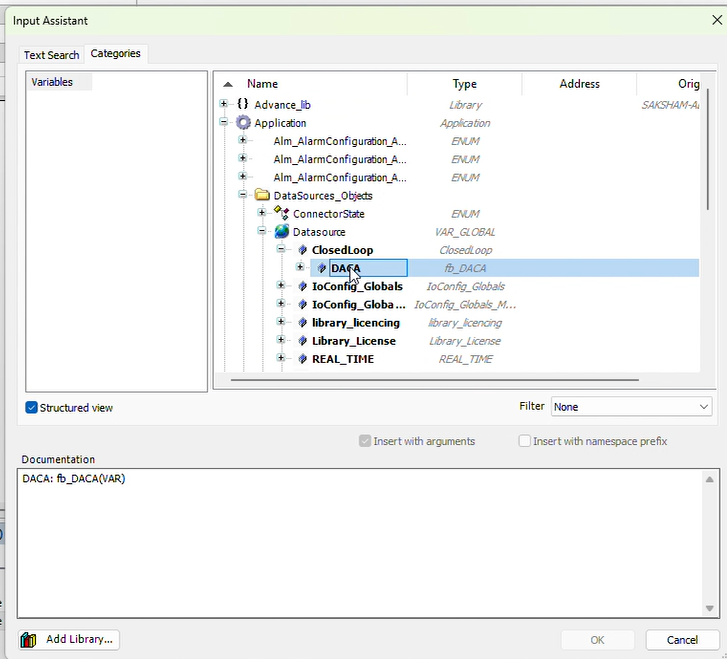
➡️ Step 14: In that tab expand the : Application > DataSources_objects > Datasource > ClosedLoop. After that select the 'DACA' and click OK and enter.
➡️ Step 15: Now click on the the 'save' and 'Generate code' button in the top of the screen. And there should be 0 error.
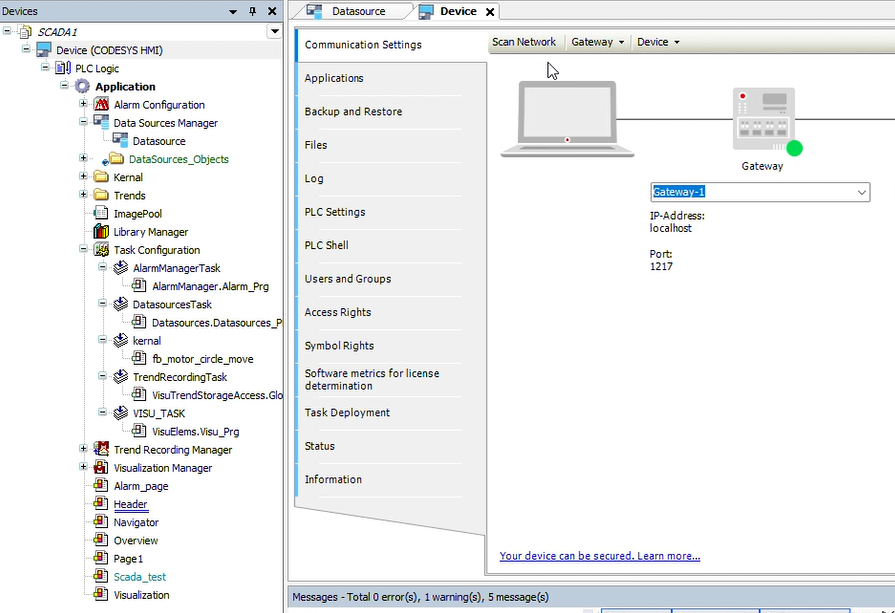
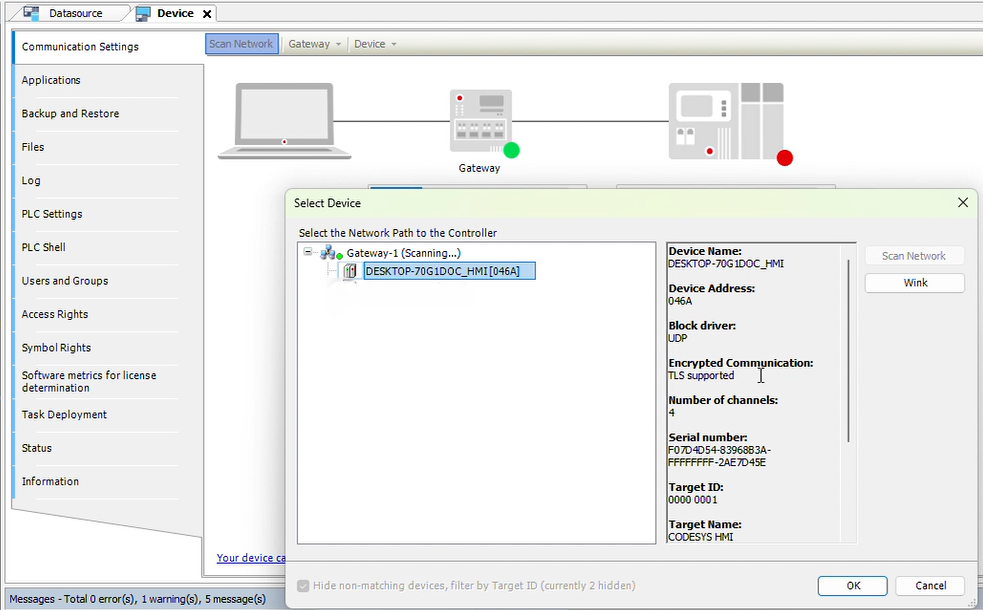
➡️ Step 16: Click on the "Device(CODESYS HMI)" select the 'Communiaction Settings' and then Scan Network.
➡️ Step 17: A new popup wil open of the select device in that select the appropriate HMI device and click OK.
➡️ Step 18: A message window will open click on the YES to set the user name and password.
➡️ Step 19: Again the same 'Add Device User' Window will open set the name password and confirm password for the HMI device and click OK.
➡️ Step 20: Device user logon window will open enter the user name and password for the HMI device. And click OK
➡️ Step 21: Now again generate code and click on the 'login'. a new message box will open click 'yes'.
➡️ Step 22: Wait for 20-30 sec until running process will stop then click on the start button to run the program.
➡️ Step 23: Overview page will open on full screen click on the window button from the keyboard and click on the codesys icon form the taskbar the project will open see the device tree in that when the data Source symbol will green it means conection succeesful and you can see the value coming on the 'DACA'.
Now You have successfully created the CODESYS login and SCADA Project first run.
For any assistance during development, configuration, or troubleshooting — we’re just a message away.
🎥 Watch the Video Tutorial
Still have questions? Watch our full installation video for a clear, visual walkthrough.
🆘 Need Help or Support?
If you encounter any issues during installation, configuration, or runtime, our support team is here to help.
📞 Contact Us
- 🌐 Website: Visit TPW Industries
- 📧 Email: jshtech@jshtech
- ☎️ Phone: +91-7398711636 (Mon–Fri, 10:00 AM – 6:00 PM IST)
- 🛠️ Online Support Portal: Submit a Ticket
📚 Knowledge Base: Documentation Hub
© TPW Industries Pvt. Ltd. | All Rights Reserved